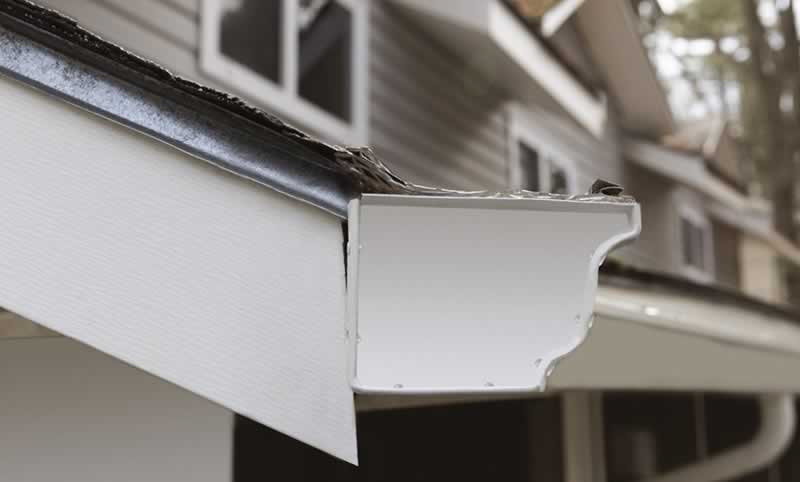
Gutter caps can reduce the need for gutter cleaning by up to 80%, saving homeowners time and reducing the risk of injuries from ladder falls. Your gutters are the workhorses of your roof drainage system, diligently channeling rainwater away from your home’s foundation. But even the most efficient gutters can malfunction if they lack a crucial component: end caps for gutters. These seemingly simple parts play a vital role in ensuring proper water flow and preventing potential damage.
Why Are End Caps for Gutters Important?
End caps for gutters serve two primary functions:
- Directing Water Flow: They cap off the open ends of your gutters, guiding rainwater towards the downspout and away from your home’s exterior walls. Without end caps, water can overflow the gutter, potentially causing leaks and foundation problems.
- Preventing Debris Entry: Open gutter ends act like an invitation for leaves, twigs, and other debris. End caps help prevent this debris from entering the gutter system, reducing the risk of clogs and ensuring proper drainage.
Types of Gutter End Cap Installation
End caps for gutters come in various materials and styles to match your existing gutter system:
- Vinyl: A popular and affordable choice, available in various colors to complement your gutters.
- Aluminum: More durable than vinyl, ideal for areas with heavy rain or snowfall.
- Steel: The strongest option, offering superior weather resistance.
- Left-handed and Right-handed: Ensure you purchase the correct end cap for each side of your gutter run.
Gutter End Cap Installation: Unique Guide
While gutter installation is often best left to professionals, replacing or gutter end cap installation is a manageable DIY project. Here’s a step-by-step guide to fit gutter end caps:
- Tools and Materials:
- End caps for gutters (left and right)
- Miter saw (optional) for a clean cut
- Tin snips (for minor adjustments)
- Phillips screwdriver
- Caulk (optional)
- Safety glasses and gloves
Steps:
Safety First: Wear gloves and safety glasses for protection.
Clean the Gutter Section: Remove any debris from the gutter end using a gloved hand or trowel.
- Dry-fit the End Cap: Place the end cap onto the open gutter section and ensure a snug fit. If needed, use tin snips to make minor adjustments. A miter saw can be used for a cleaner, angled cut.
- Secure the End Cap: Most end caps have pre-drilled holes for easy attachment. Using a screwdriver, secure the end cap to the gutter with the provided screws.
- Optional: Apply Caulk: For added security, apply a bead of caulk around the seam where the end cap meets the gutter. Allow the caulk to dry completely before testing the gutters.
- Remember: Safety is paramount. If you’re uncomfortable working on a ladder or unsure about any steps, it’s always best to consult a professional gutter installer.
By installing end caps for gutters, you’re taking a proactive step towards protecting your home from water damage and maintaining a healthy, functioning gutter system. So, don’t let overflowing gutters become a source of stress – take charge and ensure your gutters are capped off for optimal performance!
But it is better to choose a professional to do the job!
Choose Carolina Rain Gutters for Professional Gutter End Cap Installations!
Gutter caps prevent clogging, ensuring proper water flow and reducing the risk of water damage. Carolina Rain Gutters offers professional gutter protection installation using high-quality materials and a commitment to exceptional service. Schedule a free consultation today and experience the Carolina Rain Gutters difference!


